
Exploring art, creativity, ideas and the inspiration behind the creative process.
Explore my hand-painted wearable art, from transformed T-shirts and clothing to colorful freehand designs, and discover the creative process behind each piece.
Hand-Painted Wearable Art
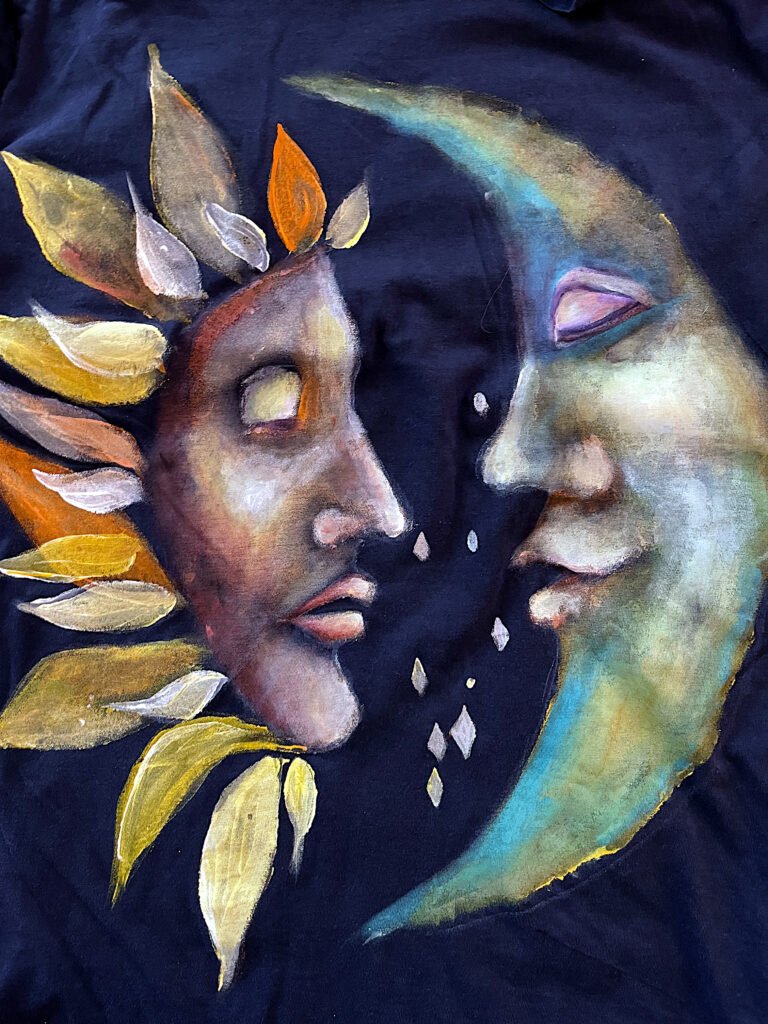
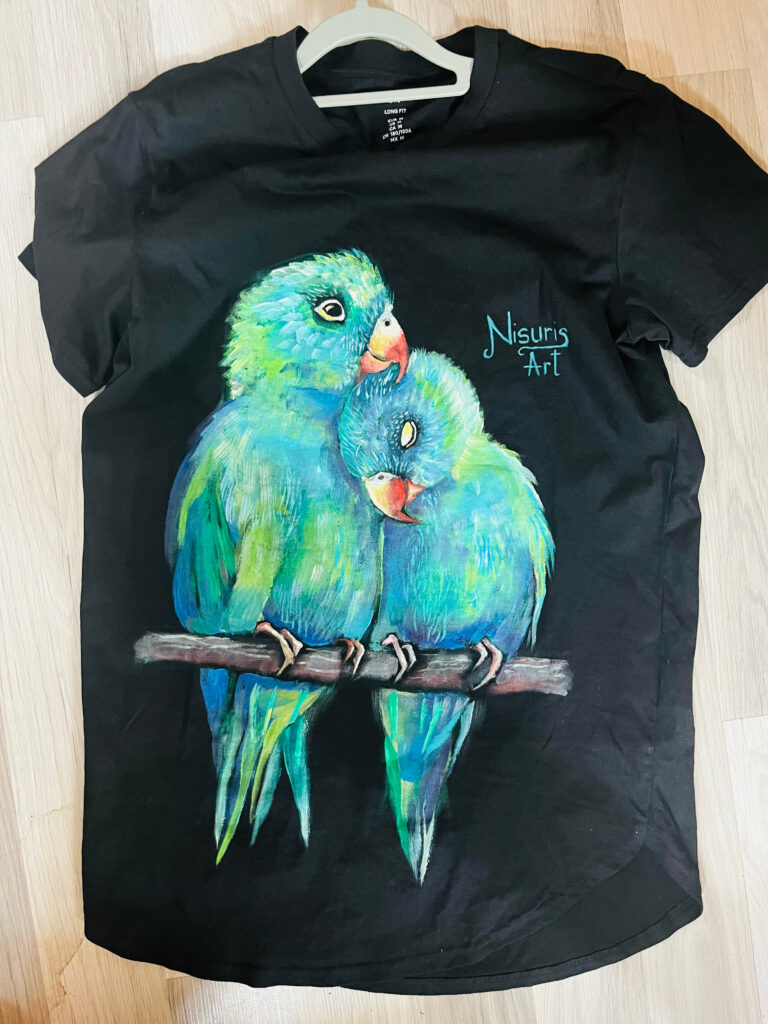
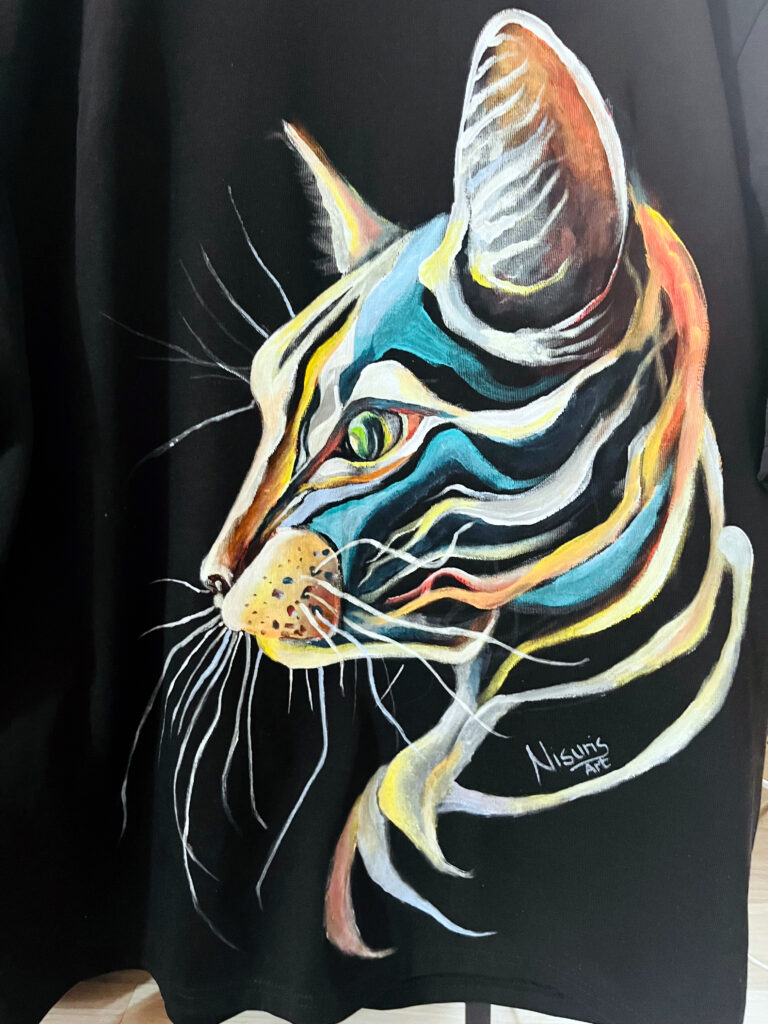
Hand-painted wearable art transforms everyday clothing into unique pieces of art that can be worn and enjoyed. For me, painting on clothes is a way to bring together art, creativity and personal expression, turning T-shirts, jackets, denim and other garments into original wearable pieces. Each design begins with an idea and develops through color, illustration and hand-painted details, making every finished piece one of a kind.
From Everyday Clothing to Wearable Art
I love the idea that an ordinary piece of clothing can become a canvas for something completely original. A simple T-shirt, jacket, or pair of jeans can be transformed through paint, color, and illustration into a piece that feels personal and unique.
My journey into painting on clothes actually started with my own wardrobe. I had many clothes that I was ready to let go of, not because there was anything wrong with them, but simply because I had grown tired of wearing them. Many were in plain or muted colors, and I felt increasingly drawn to bold colors, expressive details, and clothing that felt more like me.
Instead of getting rid of them, I started looking at those garments differently. Little by little, I sorted through my tank tops, T-shirts, trousers, shirts, and even accessories, choosing pieces that I thought could be transformed.
That became my starting point for experimenting. I selected different fabrics and garments, tested paints, colors, and techniques, and began discovering what worked best on each surface. What started as a way to reinvent clothes I already owned gradually became a creative process of its own, turning forgotten pieces from my wardrobe into hand-painted wearable art.
Experimenting With Color, Fabric & Paint
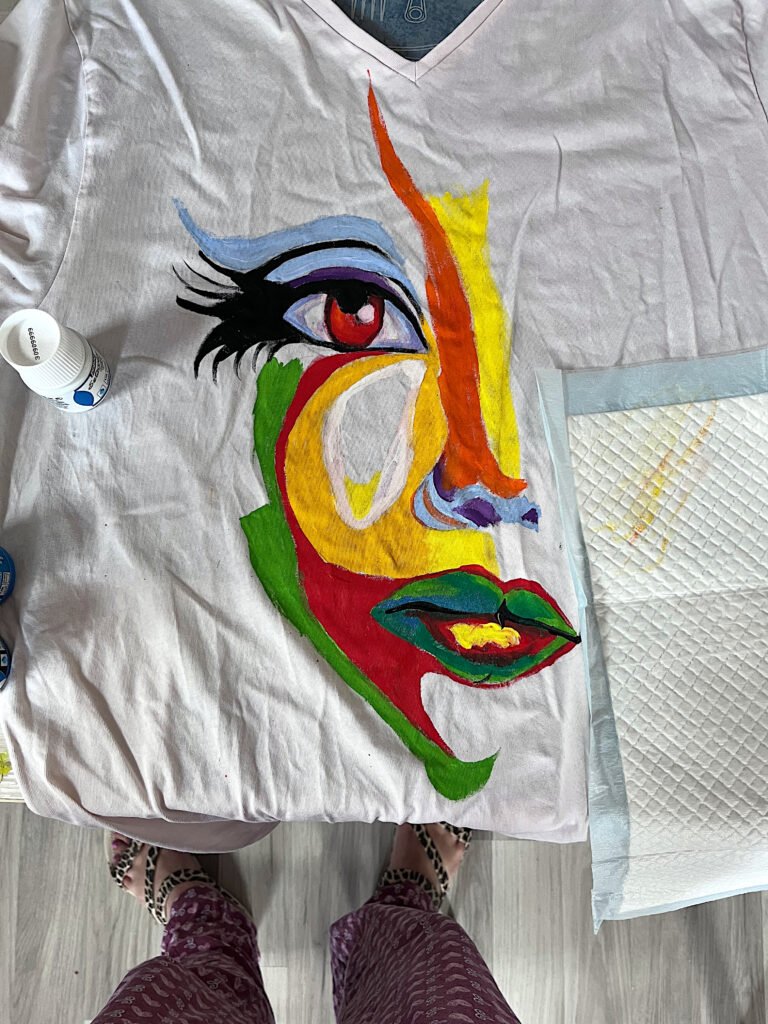
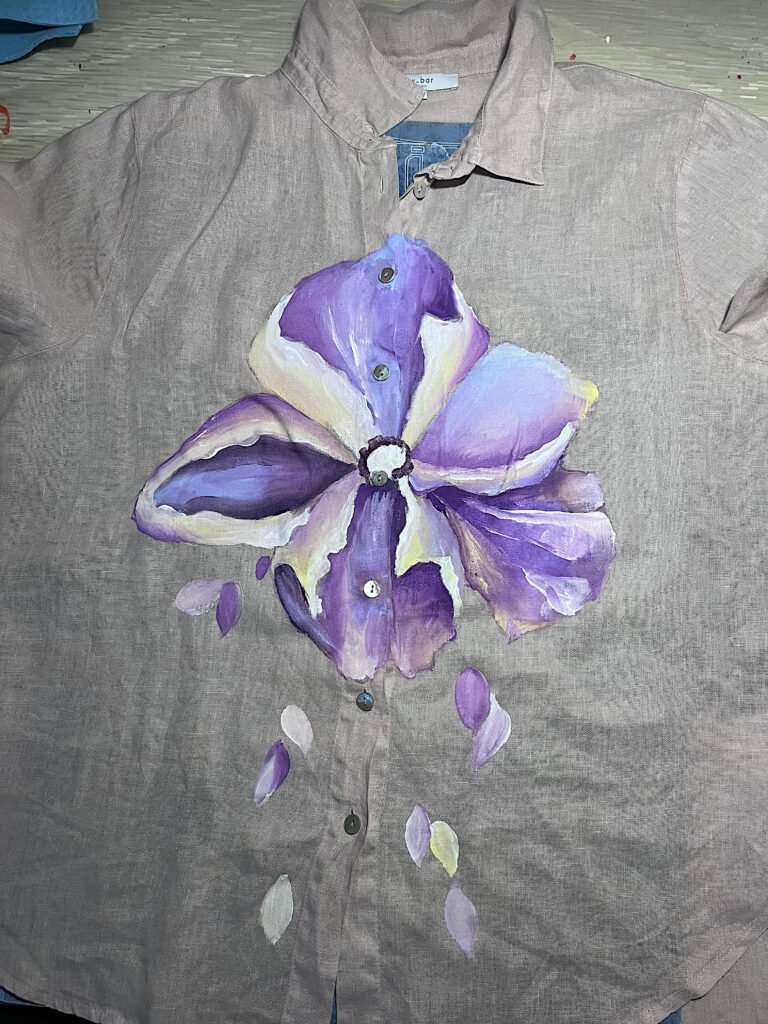
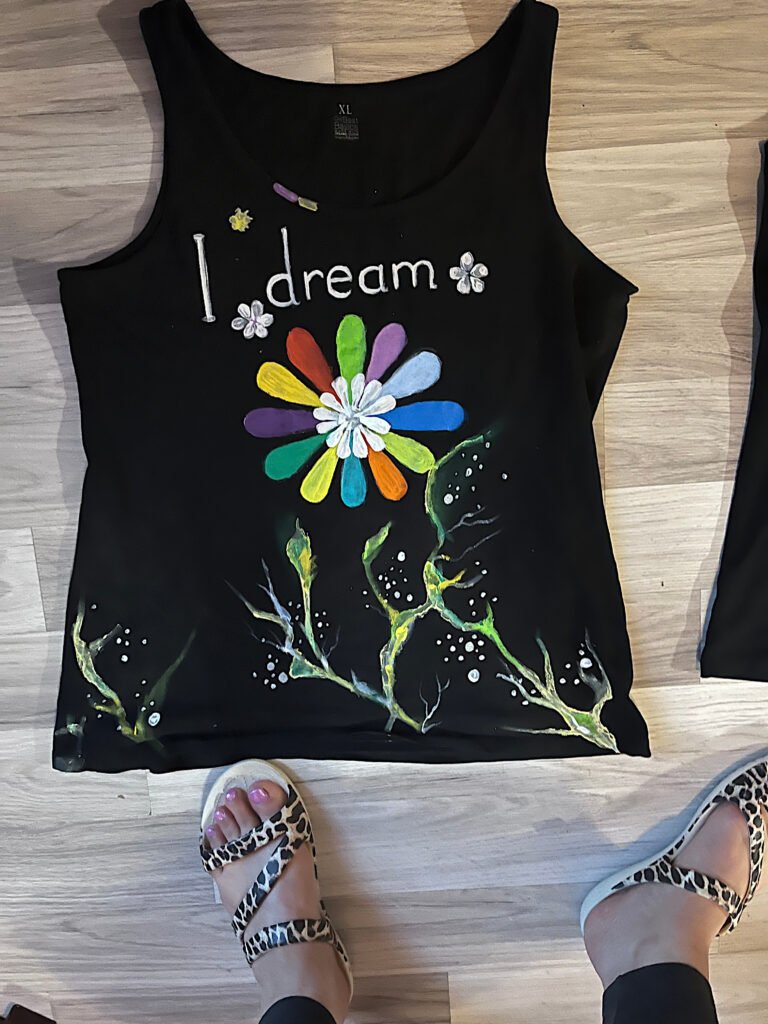
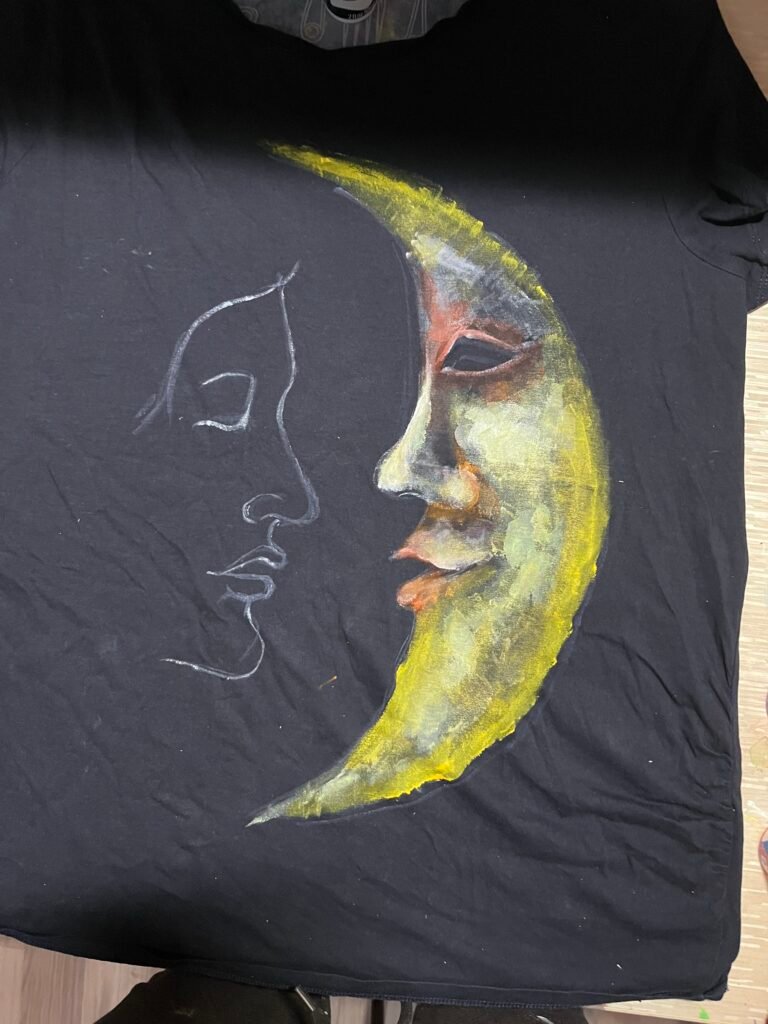
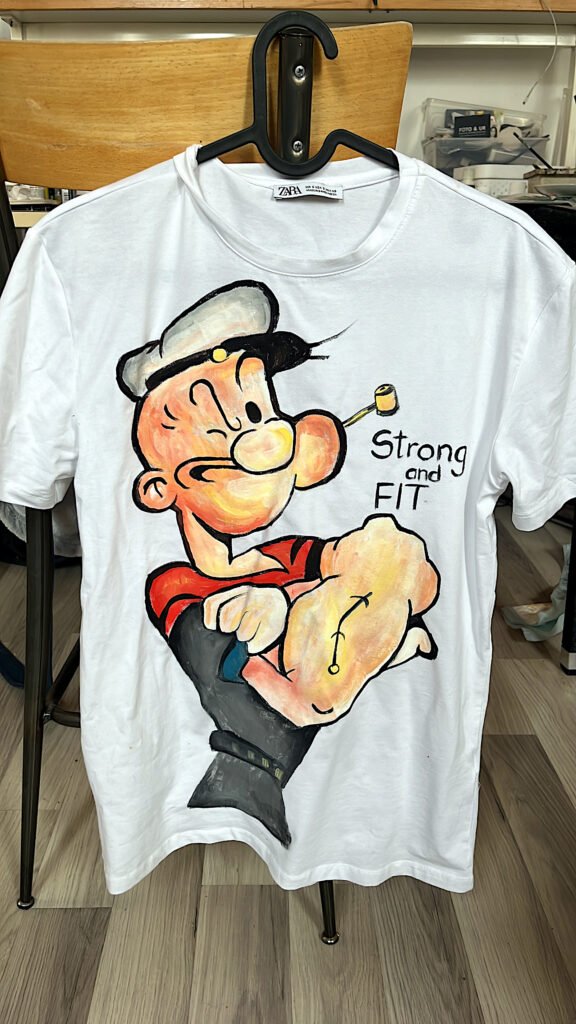
When I first started painting on clothes, I had no real plan or structured process. I simply wanted to experiment. I tried different garments, fabrics, colors and ideas, often without knowing exactly how they would turn out. Some experiments worked beautifully, while others definitely did not.
I made plenty of mistakes along the way, from choosing the wrong materials to discovering that paint behaves very differently depending on the fabric and its color. But those mistakes became an important part of the process. Little by little, through testing, adjusting and sometimes starting over, I began to understand what worked for me and developed my own way of creating hand-painted wearable art.
I’ll share some of those mistakes later on this page, because they taught me just as much as the pieces that turned out exactly as I imagined.
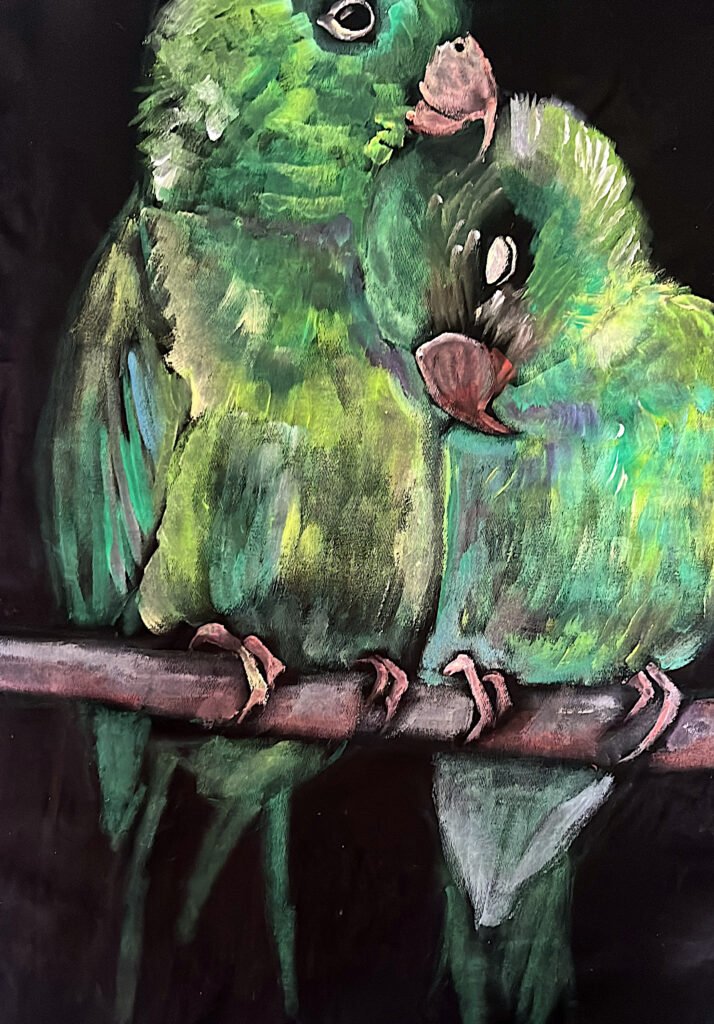
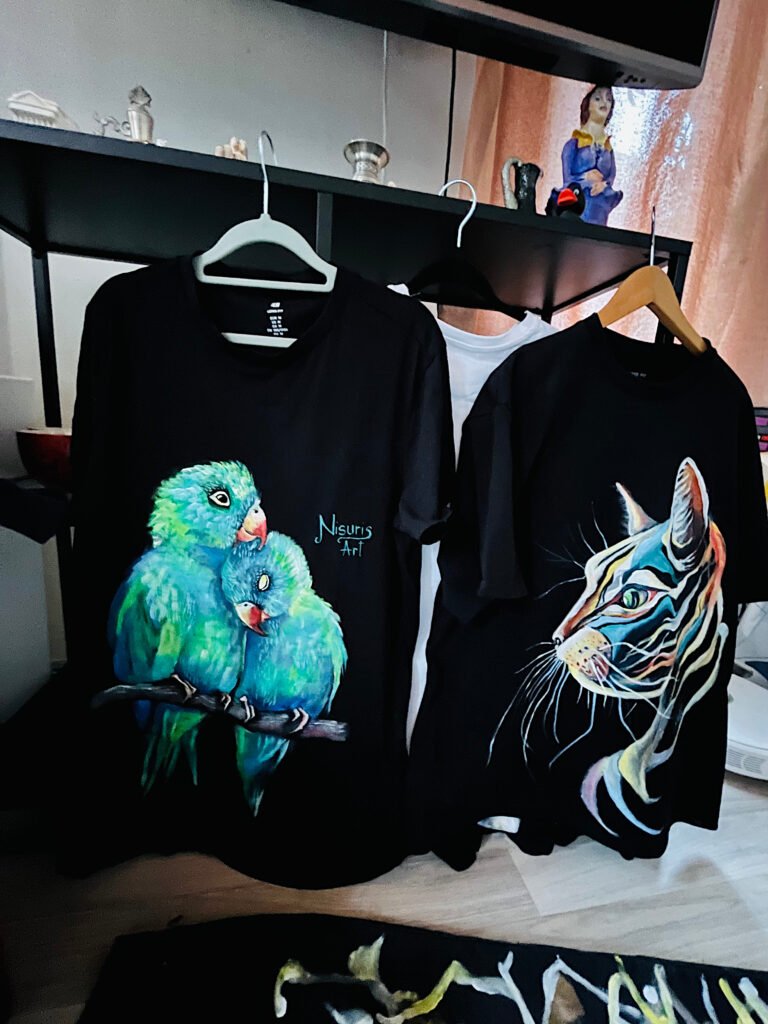
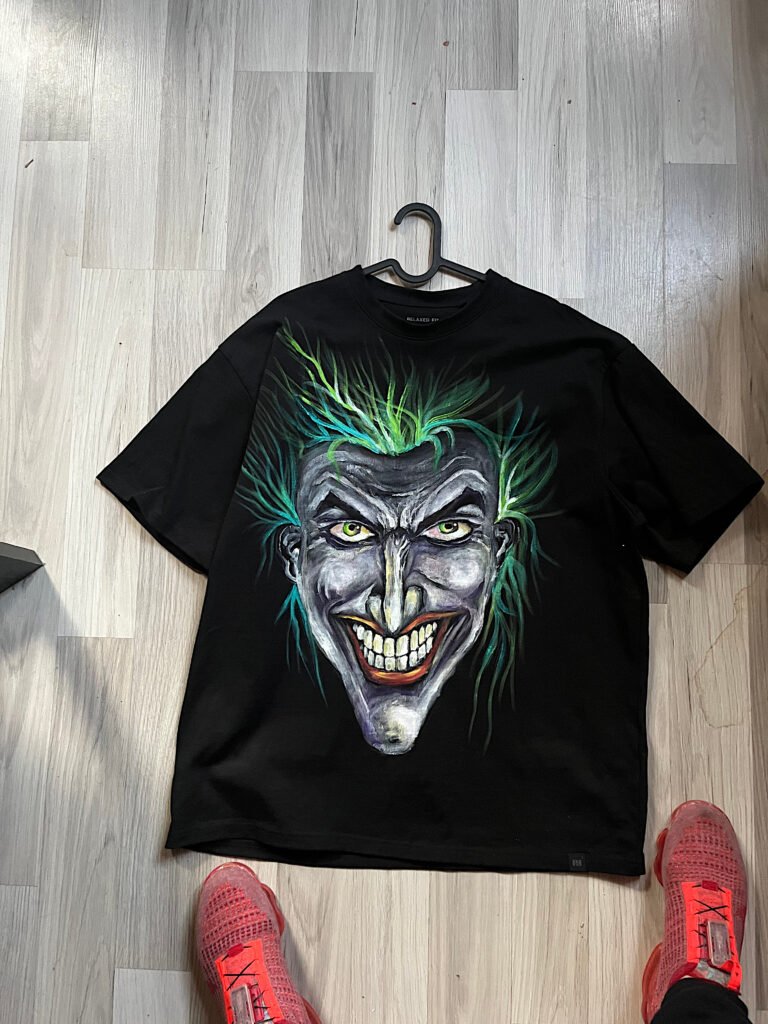
As seen in the pictures below, these early experiments show how my process developed through trial and error as I tested different fabrics, colors, painting techniques and ideas to discover what worked best for me.
My Creative Process
garment → inspiration → composition → color → painting → finished piece
Each piece follows this creative journey, although the process is never completely linear. I often move back and forth between color, composition and painting until the final design feels complete.
Choosing the Garment
In the beginning, I chose garments almost at random. I wasn’t thinking too much about which fabrics would be easier to paint or how differently each surface might react. I simply wanted to experiment and see what would happen.
Over time, I started testing all kinds of fabrics, from cotton and linen to denim, jersey, canvas, polyester blends, and smoother, more elegant or slightly shiny materials. Each one behaved differently. Some fabrics absorbed the paint almost immediately, while others allowed the color to stay more on the surface. I also noticed how much the original color and texture of the garment could change the final result. A design painted on white cotton, for example, could behave very differently from the same colors painted on dark or highly absorbent fabric.
These experiments taught me to look at a garment differently before I start painting. I now pay attention not only to its color and fabric, but also to its shape, texture and the amount of space available for the artwork. Sometimes the garment itself gives me the first idea for the design.
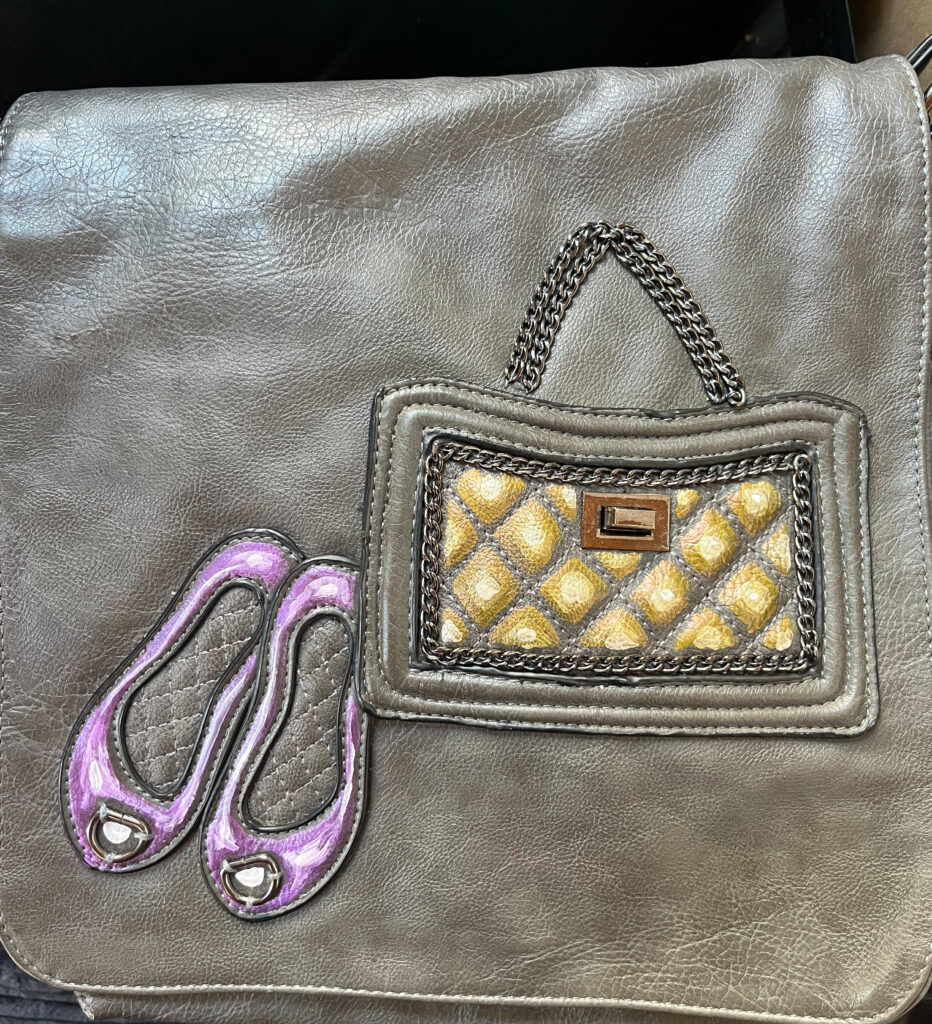
The examples below show vinyl, leather, and cotton, each reacting differently to paint: cotton absorbed the most color, while vinyl absorbed the least.
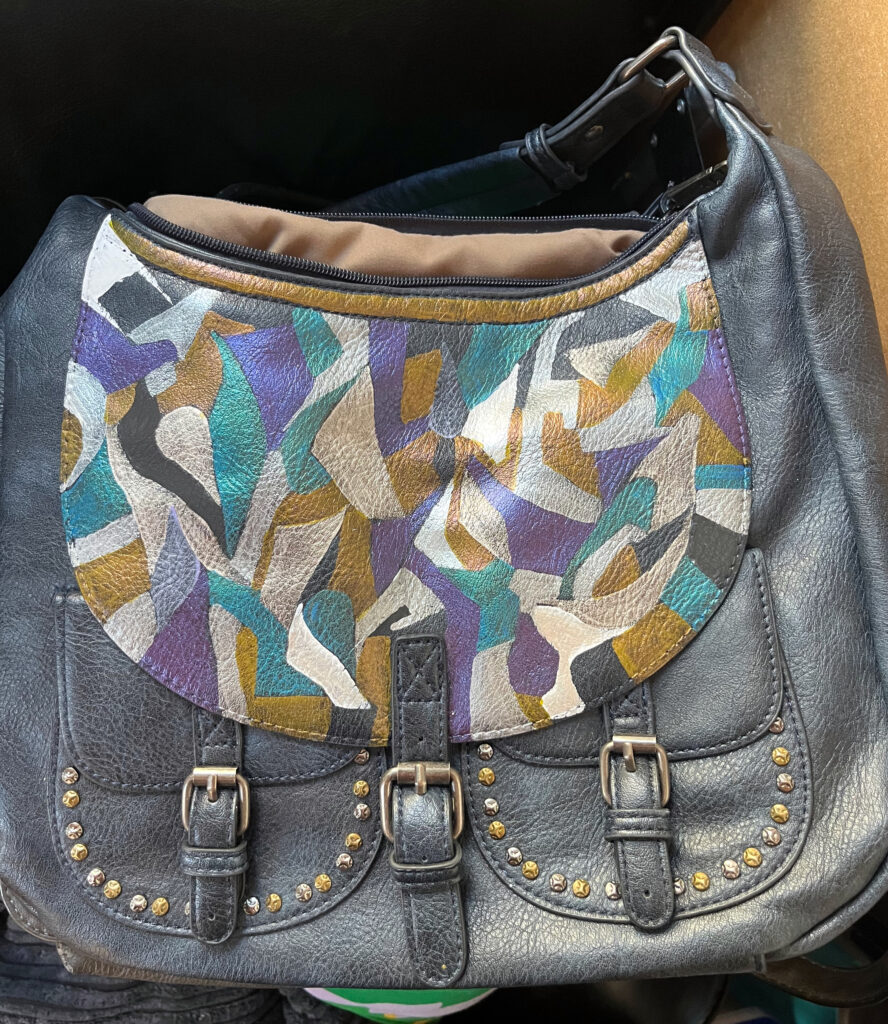
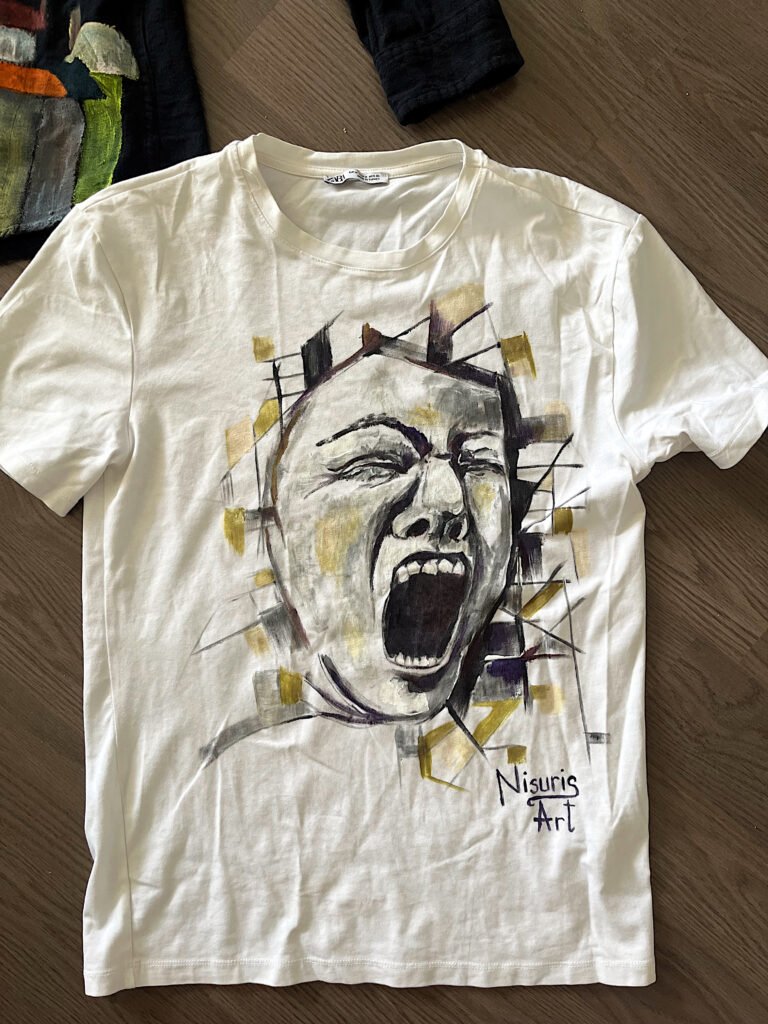
Finding the Idea
Inspiration can come from almost anywhere, and I don’t like to limit myself to one particular artistic style. A design can begin with a simple pattern or linear composition, but it can just as easily be influenced by realism, surrealism, naïve art, or something completely abstract. I have experimented with both conceptual and non-conceptual ideas, although many of my hand-painted pieces naturally lean toward geometric and figurative designs. For me, the most important part is finding an idea that works with the shape, color, and character of the garment itself.
Preparing the Fabric
Before I start painting, I make sure the garment is clean and ready to work on. Whenever possible, I wash it first to remove dust, oils, or residues that could affect how the paint adheres to the fabric. I also make sure the surface is completely dry and as smooth as possible before beginning.
For T-shirts, shirts, and other thin fabrics, I now always place a protective layer inside the garment so the paint cannot bleed through to the other side. I learned this the hard way. In the beginning, I sometimes skipped this step, and the paint soaked through the fabric, accidentally transferring parts of the design onto the back of the garment as well. Since then, protecting the layers underneath has become an essential part of my preparation.
I also position and secure the fabric to keep it flat and stable while I work. Preparing the surface may seem like a small step, but I learned that it can make a big difference both in the painting process and in the final result.
Leather and leather products require a different kind of preparation. Before painting, I use a mild leather surface cleaner or deglazer to remove oils, grease, and residue that could prevent the paint from adhering properly. I learned to be careful with this step, because a product that is too strong can affect the original finish or even remove some of the color from the leather. I prefer to work gently and test the cleaner on a small, less visible area first before preparing the entire surface.
Sketching the Design
I usually work directly on the garment and draw freehand, including lettering, outlines, and small details. This comes naturally to me after more than 30 years of experience in painting and design, and I enjoy the freedom of allowing the composition to develop directly on the surface rather than following a rigid template.
Working freehand also helps me adapt the design to the shape and character of each garment. Instead of forcing an image into a predetermined space, I can adjust proportions, lines, and details as I work, allowing each piece of hand-painted wearable art to develop in its own way.
I begin directly on the T-shirt with a brush and white paint, sketching the design entirely freehand. As you can see below, the three images show three key stages of my process, from the first painted outlines to adding color and details, and finally the completed piece.
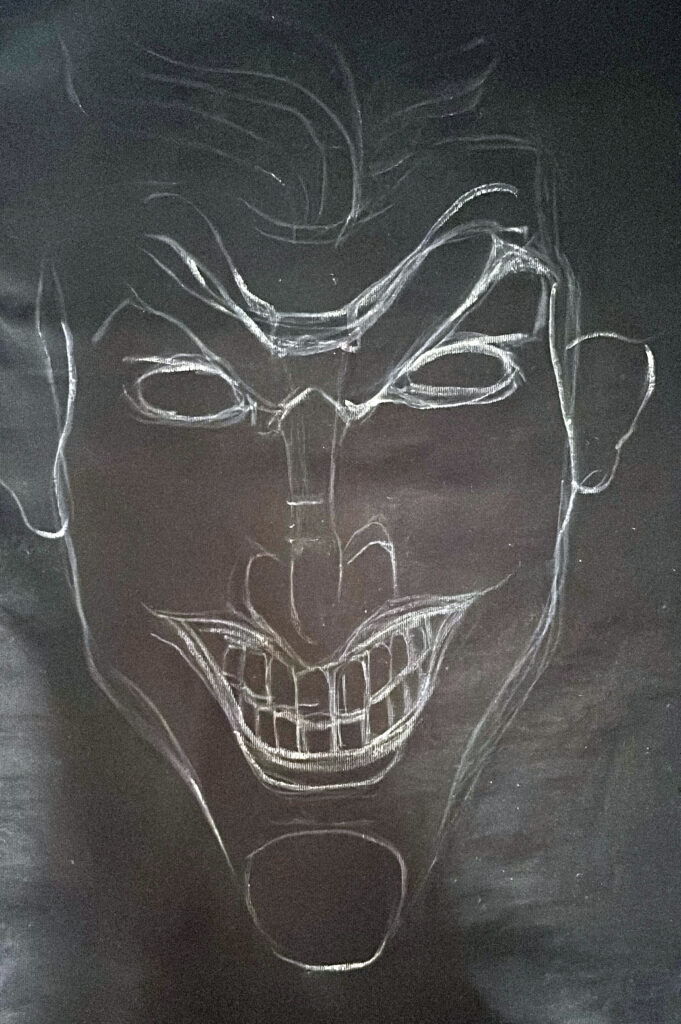
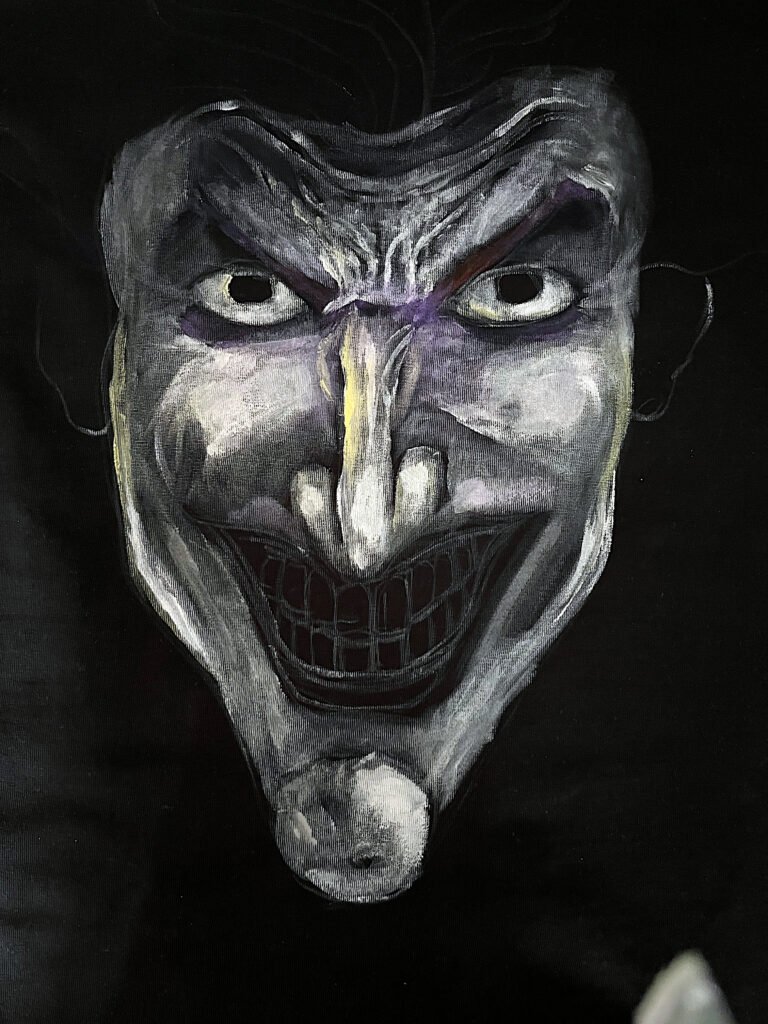
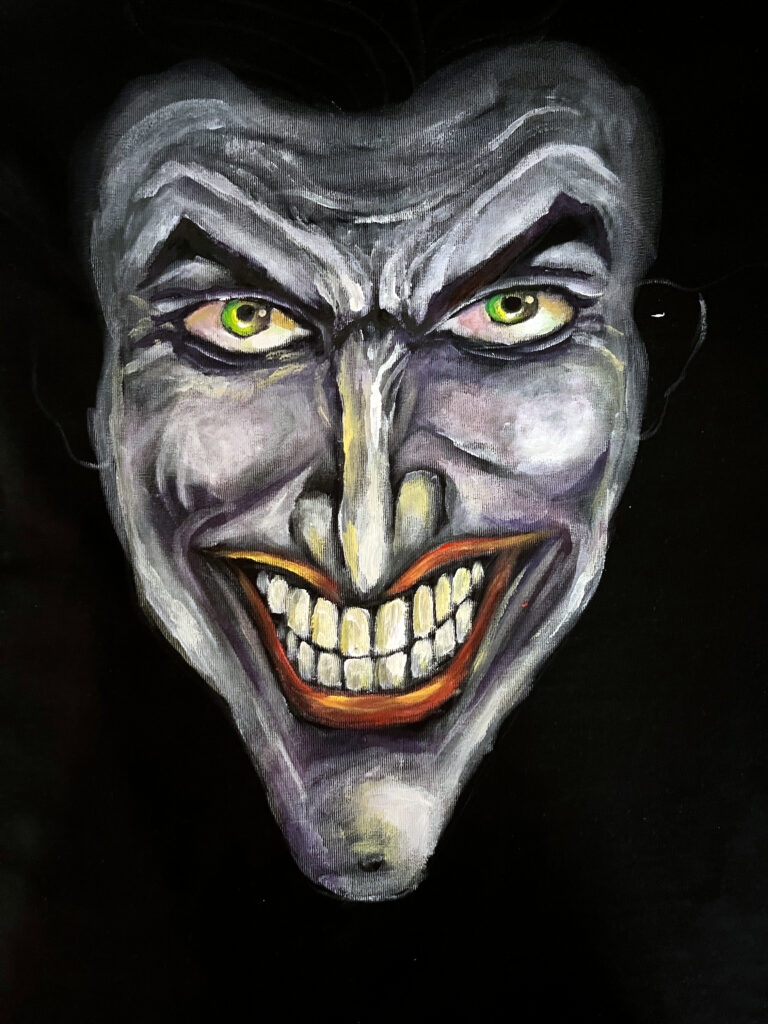
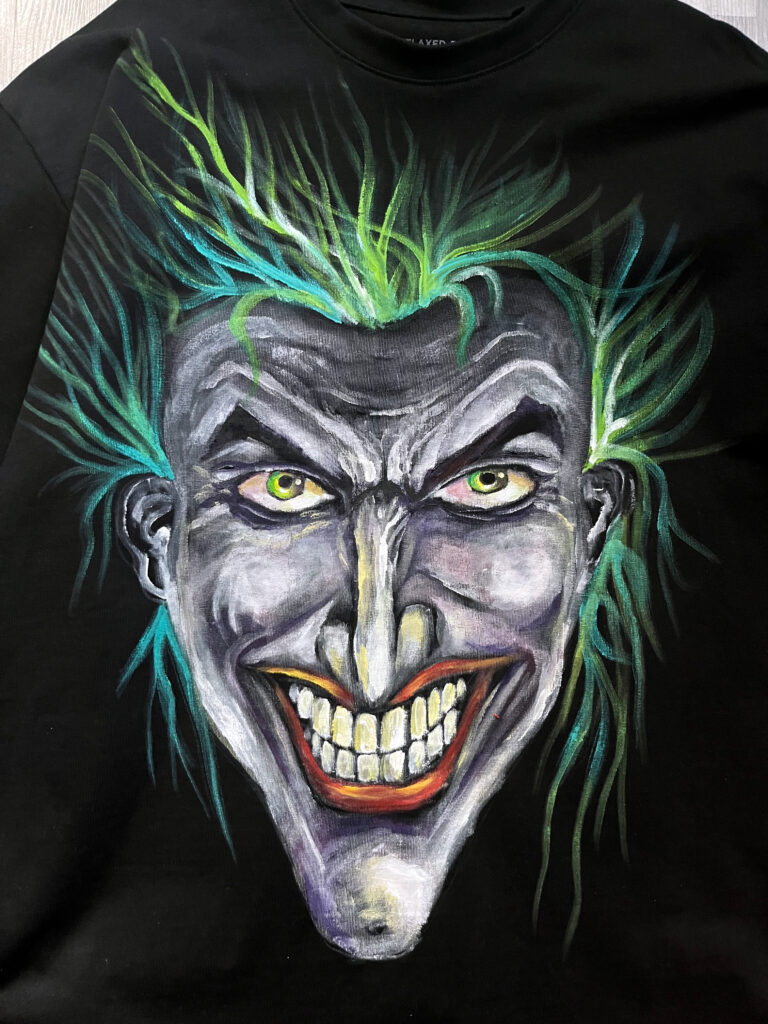
Painting by Hand
The way I apply paint depends a lot on the fabric and the garment I am working with. On some materials, I can build the design gradually with several layers of color, creating more depth, contrast, and texture. Other fabrics work better with a more minimalist approach, using fewer layers and lighter applications of paint.
I learned that adding more paint does not always create a better result. If a fabric cannot handle heavy layers, the painted surface can become too stiff and there is a greater risk of the paint cracking, sometimes within just a few days or after washing. For this reason, I adapt the amount of paint, the number of layers, and even the level of detail to the material itself rather than using exactly the same technique on every garment.
This is one of the things I enjoy about painting by hand: every surface behaves differently, and part of the creative process is learning when to keep building the artwork and when to stop.
Finishing, Drying & Setting the Paint
The quality and type of paint I use can make a significant difference in the final result. Over time, I have experimented with several brands and different types of fabric paint to understand how they behave on different materials. I have used universal fabric paints designed to work on both light and dark surfaces, as well as paints specifically formulated for either dark or relatively light fabrics.
When I work with multiple layers, patience becomes especially important. By “layers,” I mean building the artwork gradually rather than trying to achieve the final result in one application. I may begin with the initial sketch or base layer, allow it to dry, return with another layer to cover or develop certain areas, and continue the process until I achieve the depth, volume, color intensity, and details I want.
Depending on the design and the paint I am using, I may leave a layer to dry for one or two hours, or sometimes much longer, before continuing. More complex pieces can develop over several days.
My usual process looks something like this:
- Initial sketch or base layer – I establish the main shapes and composition directly on the garment.
- First drying period – I allow the paint to dry before adding more color, usually for at least one or two hours depending on the paint and fabric.
- Building the color – I gradually add additional layers where needed instead of applying a heavy amount of paint at once.
- Creating depth and volume – Further layers allow me to introduce highlights, shadows, contrast, and sometimes a more three-dimensional effect.
- Adding the final details – Once the main painting is established, I return to smaller lines, accents, highlights, and details that complete the design
- Final drying – After the artwork is finished, I normally leave the garment undisturbed for approximately 48–72 hours, depending on the paint manufacturer’s instructions.
- Setting the paint – Some of the paints I have used require heat-setting with an iron, while others do not. I always follow the instructions provided for the specific paint because the finishing method can vary from one product to another.
Testing different paints taught me not to assume that every product behaves in the same way. Drying time, coverage, flexibility, opacity, and the recommended setting method can all vary, so I prefer to adapt my process to both the fabric and the paint I am using.
Over time, I have experimented with several brands of textile paint, including Pébéo, Cadence, and Marabu, using products designed for both light and dark fabrics. I have also worked with some of my high-quality acrylic paints Ara, combining them with a textile medium to improve their flexibility and wash resistance when used on fabric. Experimenting with different paints and mediums has helped me understand which combinations work best for different materials and the effects I want to create.
Mistakes to Avoid When Painting on Clothes
When I first started painting on clothes, I made plenty of mistakes. Most of them came from experimenting without a fixed method, but they also helped me understand how differently fabrics, paints, and surfaces behave. Looking back, these are some of the mistakes that taught me the most.
1. Not Protecting the Other Side of the Garment
One of my first mistakes was painting directly on T-shirts and other thin garments without placing a protective layer inside. The paint sometimes soaked through the fabric and transferred onto the back, leaving parts of the garment unintentionally painted. Now I always separate and protect the layers before I begin.
2. Using Too Much Paint
More paint does not necessarily mean stronger color or a better result. I learned that heavy layers can make some fabrics stiff and increase the risk of cracking. I now adjust the amount of paint and the number of layers depending on how absorbent and flexible the material is.
3. Not Allowing Enough Drying Time Between Layers
Patience is especially important when building a design in layers. Applying another layer too quickly can disturb the paint underneath or affect the final texture. Depending on the paint, fabric, and effect I want to create, I allow each stage enough time to dry before continuing.
4. Treating Every Fabric the Same Way
Cotton, denim, leather, vinyl, and synthetic fabrics do not react to paint in the same way. Some absorb a surprising amount of color, while others keep most of it on the surface. One of the biggest lessons for me was to stop expecting the same technique to work equally well on every material.
5. Choosing the Wrong Paint for the Surface
I have experimented with different textile paints as well as high-quality acrylic paints combined with textile medium. What I learned is that the paint has to suit both the material and the effect I want to achieve. Opacity, flexibility, coverage, and even the original color of the garment can completely change the result.
6. Rushing the Final Drying and Setting
Finishing the painting does not necessarily mean the garment is ready to wear or wash. I normally give my finished pieces plenty of time to dry completely and then follow the setting instructions for the particular paint I have used. Some paints require heat-setting, while others have different curing instructions.
7. Not Testing First
Perhaps the most useful habit I developed was testing. When I work with an unfamiliar fabric, surface, paint, or cleaner, a small test can reveal a lot before I commit to the entire design. Many of my early mistakes could have been avoided with a simple test, but making them was also part of learning how to create hand-painted wearable art with more confidence.
Giving Old Clothes a New Life
One of the things I enjoy most about painting on clothes is seeing how completely a garment can change. Many of the pieces I started with were clothes I already owned but no longer felt excited about wearing. They were still perfectly usable, but they had become forgotten in my wardrobe simply because they no longer felt like me.
Instead of letting them go, I began seeing them as blank surfaces with new possibilities. A plain T-shirt could become bold and expressive, an old pair of jeans could gain an entirely different character, and a simple jacket could become a unique piece of hand-painted wearable art.
For me, giving old clothes a new life is not only about reuse or sustainability. It is also about changing the way we look at what we already have. Sometimes a garment does not need to be replaced. It simply needs imagination, color, and a new story.
Want to Paint Your Own Clothes?
If my experiments with hand-painted wearable art have inspired you to try painting your own clothes, I’ve put together a more detailed guide based on what I’ve learned along the way. It covers practical preparation tips, painting techniques, creative ideas, and different ways to transform ordinary or forgotten garments into something completely your own.
Whether you want to experiment with an old T-shirt, give a jacket a new personality, or simply explore painting on fabric for the first time, you can find more inspiration and practical advice in my Hand-Painted Clothing Guide.
And if you have questions, need advice, or would like to know more about a particular technique, material, or part of my process, feel free to contact me. I’m always happy to share what I’ve learned through my own experiments and experience.
Explore More From My Creative Studio
Explore my original designs, customizable products, gifts, and creative collections.
Discover my illustrated children’s books, stories, characters, and imaginative worlds.
Creative projects that give materials and everyday objects a new artistic life.
Explore my original paintings, expressive artwork, and artistic experiments.
Discover my murals and large-scale artwork created for walls and spaces.
Explore the wider world of my art, design, books, and creative projects.
 English
  French